
Watch this quick video to see Stephanie Cofield, owner of Celebration Creations, show you how to hang your grab and go balloon garland!
Bringing Your Balloon Garland to Life
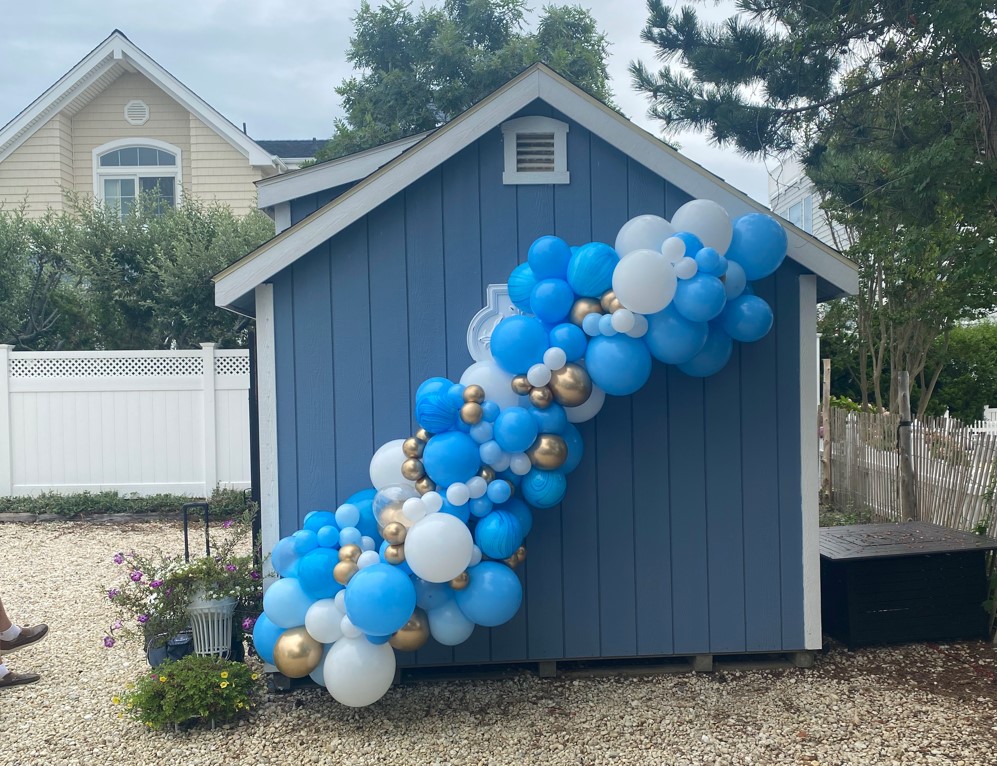
As a balloon enthusiast, I absolutely love creating beautiful, organic balloon garlands for my customers. It’s such a joy to see the delight on their faces when they get to display these whimsical, eye-catching decorations in their homes or event spaces. But I know that sometimes, the process of actually hanging a balloon garland can feel a bit daunting. That’s why I’m here to walk you through the simple steps to get your new balloon garland up on the wall, looking fabulous.
Unboxing Your Balloon Garland
When you purchase a Grab and Go balloon garland from our Celebration Creations balloon boutique located in Manahawkin, New Jersey, you’ll receive everything you need to easily mount it on the wall. Inside the package, you’ll find:
- 3 command hooks
- Stretchy rubber bands
- A package of matching ribbon (in case you want to add any embellishments)
- Double-sided tape (also for adding optional embellishments)
The garland itself will be beautifully crafted and ready to hang. All you have to do is follow these simple steps.
Hanging Your Balloon Garland
First, let’s take a look at where you want to hang your garland. Find a nice, blank wall space that will allow your garland to cascade down in a lovely, organic swag. Once you’ve chosen the perfect spot, it’s time to get to work!
Step 1: Attach the Command Hooks
Take the 3 command hooks provided and attach them to the wall in a slightly angled pattern. This will create the perfect framework for your garland to hang from. Simply peel off the adhesive backing and press the hooks firmly into place.
Step 2: Secure the Garland
Now it’s time to attach the garland to the command hooks. Take the stretchy rubber bands and loop them over each hook. You can either hook the rubber band directly onto the hook, or thread it through the loop on the hook and then secure it. Either way works great! Wrap each rubber band around one of the large balloons to easily secure the garland in place.
Step 3: Arrange the Balloons
Once the garland is attached to the wall, you can start positioning the individual balloons. The “front” of the garland will have all the cute, decorative balloons, while the “back” will be flatter to sit flush against the wall. Gently move and arrange the balloons until you have the perfect, organic look you’re going for.
Customizing Your Balloon Garland
If you want to get a little more creative, you can use the extra ribbon and double-sided tape we provided to add some fun embellishments. Maybe you want to tie bows onto the garland, or attach a few foil balloons for some extra sparkle. The options are endless!
I hope these step-by-step instructions have made the process of hanging your new balloon garland feel simple and straightforward. Remember, if you ever have any questions, you can always reach out to me or my team at Celebration Creations. Call 732-378-9922 or Contact Us any time. We’re here to help make your balloon decorating dreams a reality.
Happy decorating!